Posted by Bob Grimstead on Thursday, April 29, 2010 @ 09:24 AM:
Hi Guys,
I am hoping one of you more knowladgeable guys can help me.
I am swapping my Aussie Fournier's original Rectimo for an Aeropower 1750.
To keep it light, the new motor has a Slick mag rather than the heavier original Bendix.
But... the Bendix mag has a big hole into which a big terminal fits. Then a small tag fits under one of the housing screws.


The Slick mag only seems to have a single terminal.

So, how do I connect up the wires, please, to the new, Slick magneto?
Does anybody know?
Thanks.
Yours, Bob
Posted by SteveBeaver on Thursday, April 29, 2010 @ 10:45 AM:
Connect the black wire with the ring terminal AND the outer braid (shield) of the old P lead connector to any convenient ground screw on or near the magneto.
Connect the inner wire (inside the outer shield) to a new ring terminal and then to the stud on your Slick mag.
Best way to do this is shown here: http://www.matronics.com/aeroelectric/articles/shldwire/shldwire.html
Steve
PS - 10 demerits for posting to the forum with dirty finger nails 
Posted by jb92563 on Thursday, April 29, 2010 @ 11:00 AM:
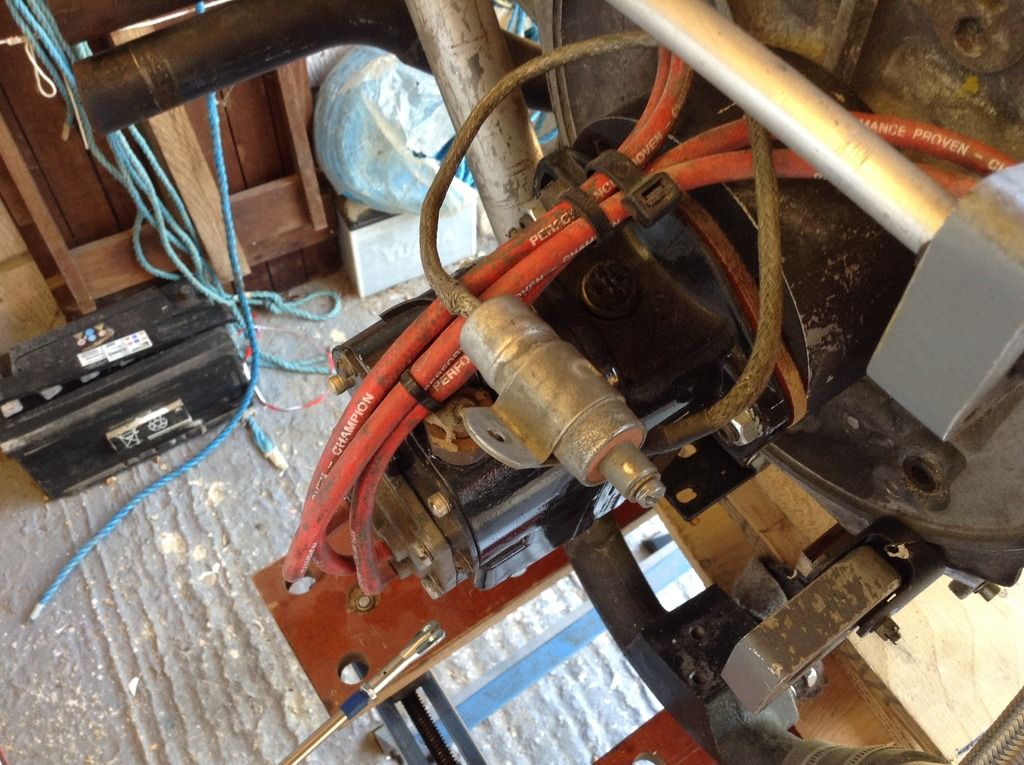
Just an observation on the Slick mag in the picture.
I thought it worthwhile to mention that the aluminium plug with the holes in it is the breather
for the underside of the mag.
You dont want dirt or moisture entering the top of the Mag through those holes.
There would be a similar cap with no holes for the top of the mag.
Note: Be very cautious engaging the threads in those holes as the plugs are aluminium and easy to strip or cross thread if you are not carefull.
[Edit by jb92563 on Thursday, April 29, 2010 @ 11:06 AM]
--------------------
Ray
RF4D #4057 N-1771 Rectimo 1400cc
http://picasaweb.google.com/jb92563/FournierRF4D
http://www.touringmotorgliders.org
Posted by Bob Grimstead on Thursday, April 29, 2010 @ 08:24 PM:
Hi Guys,
Thank you very much for all that, and I promise to scrub my nails when I'm done.
Yours, Bob
Posted by Bob Grimstead on Friday, April 30, 2010 @ 10:47 PM:
You're right Steve, and I'm sorry. Dirty nails badly lower the Forum's tone.
Here you are, clean nails, Bob.....
.
.
.
.
.
.
.
.
.
.
.
.
.
.

[Edit by Bob Grimstead on Friday, April 30, 2010 @ 10:48 PM]
[Edit by Bob Grimstead on Friday, April 30, 2010 @ 10:49 PM]
Posted by SteveBeaver on Saturday, May 1, 2010 @ 09:20 AM:
Very funny Bob!
Posted by Bob Grimstead on Thursday, June 4, 2015 @ 06:03 AM:
I'm sorry Steve, but I have to ask for your help again.
Wagon's wiring was just hacked off roughly at the firewall and behind the instrument panel.
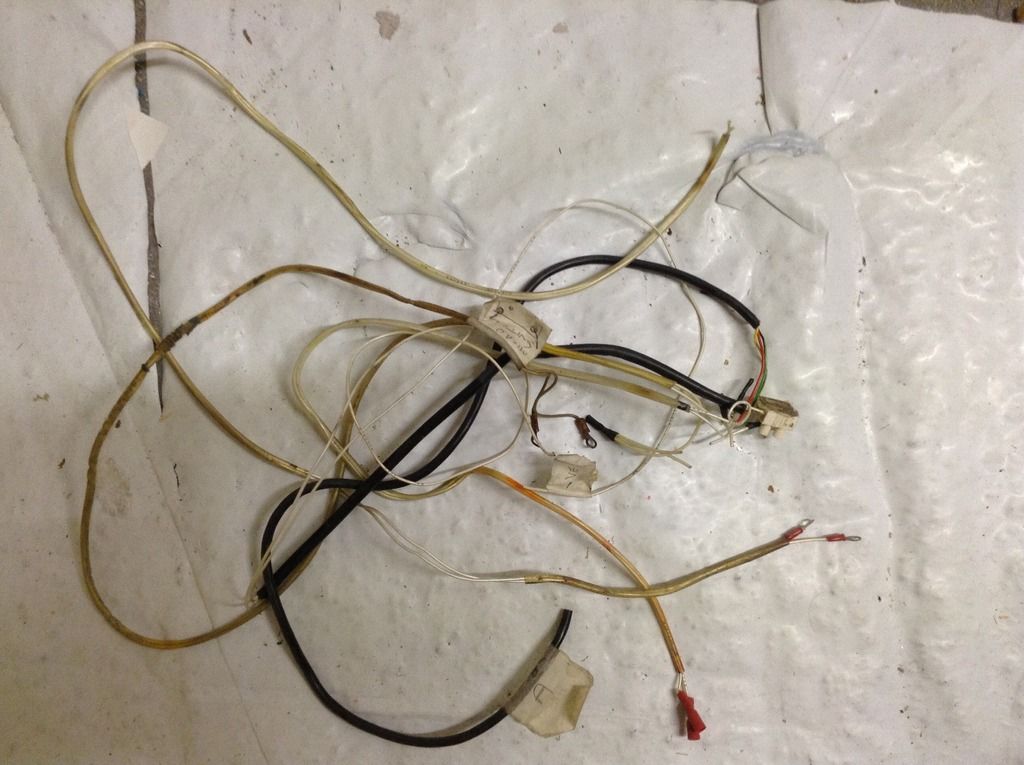
I'm trying to re-wire the magneto's P leads.
I'm guessing that this condenser's tang goes under the head of one of the mag's through bolts, along with one of the P leads from the mag switch, and the other P lead goes to the screw on the condenser's end?
Any advice gratefully received.
PS, fingernails are clean today because Aussie friends are visiting ;-)
Yours, Bob
--------------------
Flying and displaying Fournier RF4Ds VH-HDO and G-AWGN, building replica RF6B G-RFGB and custodian of RF6B prototype F-BPXV
Posted by SteveBeaver on Thursday, June 4, 2015 @ 07:53 AM:
Hi Bob,
Here is a pretty good drawing of how to mount and connect the optional magneto noise filter: http://www.lonestaraviation.com/downloads.php?productid=17547&dlid=2
And a picture from Aircraft Spruce so we know what we are talking about:
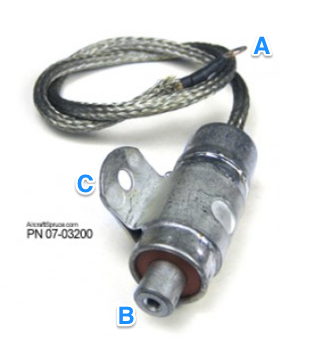
There is an shielded wire exiting one end of the filter body, (A) and a stud exiting the other end (B). The inner conductor of the shielded wire and the stud are connected together. In effect the wire runs through the center of the filter body and terminates on the stud. For this reason this type of filter/capacitor/condenser is known as a "feed through" filter.
First step is to securely mount the filter to (or very near to) the magneto by means of its mounting tab (C).
Now connect the inner wire (A) to the 'P' lead terminal on your Slick magneto using a ring terminal.
You have two choices when it comes to the outer, braided shield on that wire. You can trim it back a half inch or so and cover it with some heat-shrink tubing so that it cannot come into contact with the 'P' lead, or you un-weave a couple of inches, twist it into a wire and use another ring terminal to connect it to a convenient ground somewhere on the magneto. It doesn't actually matter but most people do connect the (ground) shield.
Here is an excellent guide to preparing the end of a shielded wire: http://www.aeroelectric.com/articles/shldwire/shldwire.html
Now all that remains is to connect the stud end (B) to you magneto switch. Use a good quality shielded wire. Using two ring terminals connect the inner conductor to the stud, and the outer braided shield to a convenient ground.
In the cockpit, again prepare the wire by un-weaving a short section of the outer braid to form a wire, then connecting that to one pole of your mag switch, while connecting the inner conductor to the other pole.
When the switch is closed, the magneto 'P' lead will be grounded, preventing the engine from running. When the switch is open, the engine can run.
Finally, consider that the filter/condenser/capacitor is optional. its job is to suppress radio interference. If your engine doesn't produce any noise in your radio (mine doesn't) don't bother with it. Connect your 'P' lead directly to the magneto.
That's about it.
Note: Some may wonder "Why doesn't it matter it the outer shield of the filter is connected to the magneto or not?". The answer is that in general, it is better to connect the shield at one end only. When current flows through a wire it creates a magnetic field. This magnetic field can then induce a current in another, nearby wire (transformer effect) and hence we may get radio noise. If we cover the first wire in a tight metal braid (shield) it will trap the magnetic field inside and prevent it from causing interference. BUT, if the shield is connected at both ends, the magnetic field will induce a current in the shield, which will generate its own magnetic field (albeit weaker). If the shield is connected at one end only, current cannot flow through it. (It needs somewhere to go), hence there can be no secondary magnetic field. - That's the theory anyway. Electrons have minds of their own though
Steve
Posted by Fredrik S on Thursday, June 4, 2015 @ 08:04 AM:
Not sure if bendix magnetos have the same little ingenuity as slick mags since i haven't worked with Bendix magnetos.
But a tip is that behind the cap with the ignition cords on slick magnetos there are 2 holes.
One marked "R" and one marked "L". When mounting the magneto, be sure you've put a drill of right size (My memory says 5mm but i'm not sure) in the corresponding hole for your engines rotation ("L" for left rotation and "R" for right rotation) and turned the magneto so that the drill falls in and "locks" the magneto in the right position for mounting with the engine in TODC.
The SLICK magnetos have a marking on the sideplate where the type and serialnumber are stansed that tells you if your magnet is made for right or left rotation.
This is very important because you won't be able to adjust the timing to a correct setting nor will you get the engine to fire otherwise.
At least this is the case with old Slick 4230 and later 4330 magnetos for Limbach 1700-2000 engines etc.
The Limbach engines are Left rotating (Propeller going counter-clockwise when sitting in the plane) and i'm guessing that rectimos have the same rotation.
Just a tip if some reader is about to do the same thing as Bob but don't have the information
[Edit by Fredrik S on Friday, June 5, 2015 @ 02:16 AM]
--------------------
Best regards
/Fredrik Svanberg
RF4D serial#4104 SE-XSK
Posted by Bob Grimstead on Tuesday, June 9, 2015 @ 06:19 AM:
Thank you very, very much Steve for not only telling me what to do, but explaining in such detail exactly how to do it.
Following your step-by-step instructions was very straightforward, so that is now another annoying little job complete, and another technique learned.
I never did want to do so much work on my poor little aeroplane, but it has become strangely satisfying to learn all these new skills and put them into practice.
There is still a lot to be done, but I can now see the light at the end of the tunnel.
Yours, Bob
--------------------
Flying and displaying Fournier RF4Ds VH-HDO and G-AWGN, building replica RF6B G-RFGB and custodian of RF6B prototype F-BPXV