Posted by SteveBeaver on Saturday, February 29, 2020 @ 08:01 PM:
When I was in school my English teacher said Dylan Thomas’ famous poem was something to do with death and old age I have come to believe that is not so. He was in fact contemplating recovering a Fournier. Not a task to be tackled lightly.
It seemed like a good idea at the time. I have covered four other aircraft and they turned out quite well. The fabric on the Fournier was in decent shape, but the paint was not. 4114 had been painted with with automotive paint (Imron) and with every tiny flexing of the structure another chip or three would sucomb to the wind. As a test, I tried pulling the fabric off the rudder. It was easy enough. It came off cleanly and left a dull, pristine surface ready for a light sanding and a coat of varnish. I committed to the recover.
Then I moved on to the fuselage, fin and horizontal stabilzer and it all started to go horribly wrong. The previous person appeared to have painted the fuselage on top of the original paint and cotton fabric, while the the tail surfaces had Imron on bare wood! No wonder it was flaking. Removing even the smallest area was an exercise in frustration. The paint was stuck like you-know-what to a blanket and no chemical at my disposal would remove it. Heat was too dangerous and sanding it both a heath hazard and really hard work.
It was incredibly slow going. Scraping, softening, warming, sanding, stripping a layer at a time until I got down to the cotton, then acetone for the final couple of layers. This work took place over the course of a couple of years during which I was working on other aircraft, flying the Jungmann, moving house and working for a living, but finally it is done. The whole aircraft is now stripped and clean, ready for its first coat of epoxy varnish.
Once that is done, I plan to cover it with Oratex fabric. I have been communicating with Bob Grimstead and with the US dealer and will be ordering the supplies in the next week or so. I have not used the process before, but I am confident it will work well on the Fournier. Above all it will not fill the house with obnoxious fumes and I may still have a happy spouse at the end of the process.
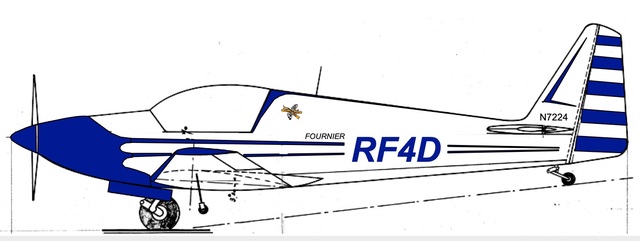
This is the design I am contemplating. I hope it retains the theme of the original, but does not plaster my registration letters in a huge font on the side of the fuselage. I have enough trouble maintaining any sort of privacy without that 
I will post progress here as it occurs.
Posted by Donald on Monday, March 2, 2020 @ 05:23 PM:
Looks good Steve. Very classic.
Also you are avoiding one common feature which I think is a mistake, aligning the upper cheat line on the fuselage with the edge of the cockpit. To my mind that just complicates paint trimming at the opening.
Posted by Jorgen on Monday, March 2, 2020 @ 06:23 PM:
Thanks Steve,
congratulations on getting down to the bare wood and we've had heated discussions on how to cover and uncover Fourniers before, haven't we?
Your proposed design looks good but I just feel very strongly that the sensual leading edge-like profile just above the wing root is such a classy looking feature of the RF 4. If you just retain that it looks like a real Fournier regardless of how you choose to paint the rest. Below a picture of how I found my 4 sitting on the tarmac at the Bicester Aerodrome in the UK and I think it was the curvy lines or to be more specific that particular line that made me fall headlessly and helplessly in Love!
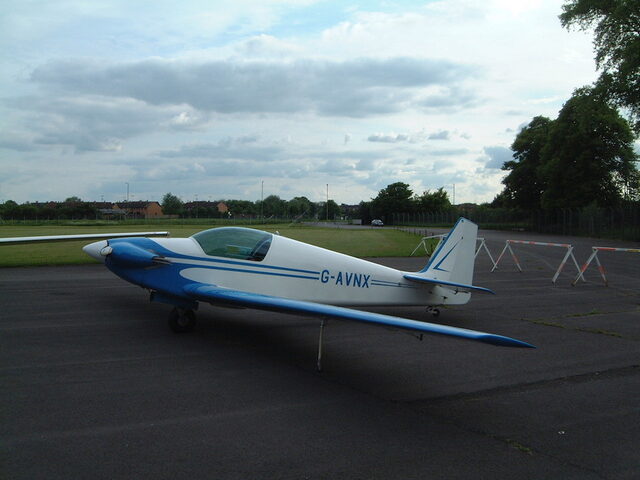
May the 4's be with you/ Jörgen
[Edit by Jorgen on Monday, March 2, 2020 @ 06:29 PM]
Posted by Bob Grimstead on Wednesday, March 4, 2020 @ 00:13 AM:
That is a delightful colour scheme Steve,
I had exactly the same trouble you have had with getting the old fabric off my Australian Fournier. It was immensely frustrating and time-consuming, although I did achieve success in the end.
René's original colour scheme had that upper side stripe right along the edge of the cockpit cut out, but I don't think it makes much of a difference if you have yours a little lower.
I would agree with Jorgen however that the NACA 23012 leading edge curve (if that is what it is) at the front is an important facet of the classic Fournier colour scheme. Despite reworking both of mine a couple of times, I still don't have them quite right. I should have done what I suggest that you do: trace the leading edge of the wing root onto a piece of cardboard and then cut that out to use it as a template for your masking.
I used the Oratex 500 UL fabric, but knowing what I know now I would have used the 5000 instead. It is not much more expensive, it is very little heavier, but I think it would be much more durable. It would probably also be less transparent.
I also like that you have displayed the aircraft type in big letters on the side and your registration in small letters on the fin. Unfortunately in Britain and Europe the authorities insist on foot-high registration letters, otherwise we would all do the same thing.
Finally, I like the stripey rudder too. Neither wagon nor HDO has a stripey rudder, but I think my next Fournier will.
Good luck and Godspeed with the re-covering process.
Fourniers forever!
--------------------
Posted by SteveBeaver on Thursday, March 5, 2020 @ 08:16 AM:
I intend to use the heavier grade of Oratex too. After the epoxy varnish coat, it seems like it would also be a good idea to apply a very light coat of white primer over the seems in the plywood where the dark, almost black glue lines would otherwise show through.
I don't think I am going to attempt to cover the tips either. I have filled, sanded and varnished all of the balsa until it looks as smooth as fiberglass and will now paint them, in places white, in other places blue. That way there should be very few compound curve to worry about.
Posted by Bob Grimstead on Thursday, March 5, 2020 @ 09:03 AM:
Three very sound plans Steve.
I do hope you're going to share progress photos with us.
And I hope it all goes well, Bob
--------------------
Posted by SteveBeaver on Saturday, March 21, 2020 @ 03:23 PM:
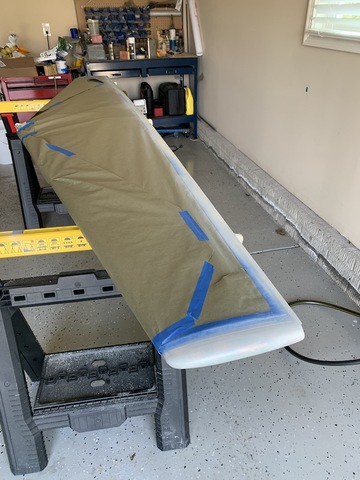
The tail surfaces are almost ready to cover. Filled as needed with Super-Fill, sanded and varnished with Stitts epoxy varnish. Next I need to apply a light coat of white paint to the trailing edge spar and to any dark glue lines. The paint has to be really light so that the grain of the wood is still visible. This is to allow inspection of the wood for crack.
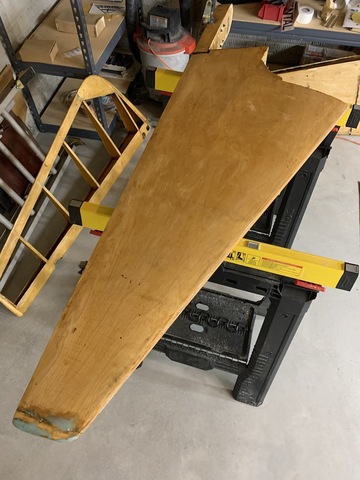
These paper templates are to scale and used to calculate the amount of (expensive) fabric required.
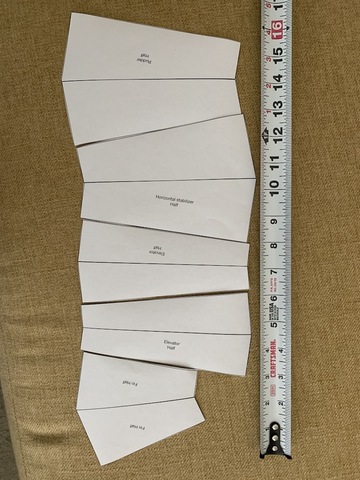
The fabric has been ordered. Now I need to wait to it arrive from far away Alaska.
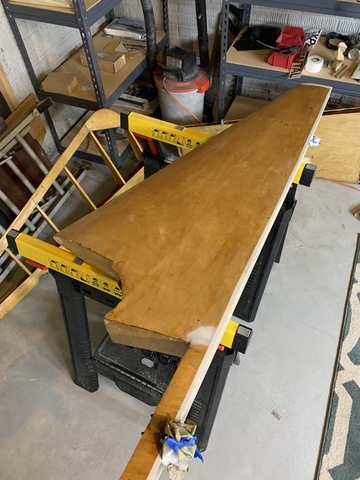
Now with the coves, tip and trailing edge skins painted.
In theory a single piece of fabric should wrap around the leading edge being glued very throughly to the trailing edges, then trimmed with a sharp blade. We'll see how theory meets practice in a later episode
Posted by SteveBeaver on Monday, April 6, 2020 @ 07:45 PM:
Horizontal stabilizer varnished, masked and with the tips & cove painted. The Oratex fabric should be on the way this week.