Posted by Bob Brock on Thursday, July 2, 2009 @ 01:18 PM:
Greetings RF-4D experts (one day I may join your ranks) but for now I am just trying to get it flying again.
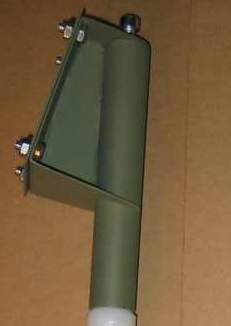
I removed the outriggers and noticed parts of the brackets were broken so I removed them. One looks original and the other, was homemade. I can machine the tubes out of aircraft chrome molly, but I don't know how they should fit into the wing ribs, more specifically the screw thread at the top of the longer tube. If you can give me some insights and advice I would be most appreciative. I have 5 pictures and captions that should show you what I am dealing with. Please the album at:
http://picasaweb.google.com/lh/sredir?uname=Bomar1&target=ALBUM&id=5353904099651142321&authkey=Gv1sRgCPzjyaap8I_TZw&feat=email
Additionally, I removed the instrument panel and fabric side panels. Oregon Aero makes some wonderful seats and they were kind enough to sell me aircraft fabric for only $ 18/ yard (about 36" by 42" . Today I am going to their supplier (Perfect Fit here in Portland) for thread and other items needed redoing the interior. I will post more information as I progress.
My hopes were to fly this aircraft to an airshow coming up in a week, but there is way too much to finish. Collin is going to fly his RF-5b to the airshow and suggested I fly his RF-4D so people would have a chance to see both aircraft.... more later.
Posted by Bob Brock on Thursday, July 2, 2009 @ 01:32 PM:
OK, I should have realized that this was covered and I did find drawings from Jorgen in the modifications section... the drawings will be most helpful in rebuild the brackets but I still do not understand how the long tube is held in place other than the two wood screws that hold the bracket to the underside of the wing...
Posted by Collin on Thursday, July 2, 2009 @ 02:04 PM:
This is what is on N2182 till I install single pole setup. Bob if we fly Friday morning I will fly the 4D to North Plains and you can have a better look. I also may have some bracket from N2188.

Posted by Jorgen on Friday, July 3, 2009 @ 04:40 AM:
Hi Guys,
sorry I have been "out" for a while, I will have a lot to tell you when I catch up. Just a quick answer to Bob- you do notice that you need an ashwood block (not sure it is there originally, but it probably is) in the 10th rib to mount the outriggerfitting in.
On RF 4 D SE-XST, there is a small hole in the wing upper surface corresponding to the outriggerfitting covered with a piece of tape. Maybe Mr Buckner covered that hole with fabric?
If you look at the drawing of the "single pole" outrigger mod you notice the longer one of the two rods on the outriggerfitting seated in the wing is threaded for a M6 bolt. This rod does not penetrate all the way through the rib until the upper side, instead there is the above mentioned smaller hole for the M6 bolt drilled through the upper part of the 10th rib. This smaller hole is metal-clad on SE-XST as far as I can see when I peek through the hole. The bolt on XST was black quality, hexagonal head.
One of the things I haven�t updated you Guys on is that I broke the outriggerfitting on SE-XST. I�m having the fitting done (and some spare ones) now, I think the reason for me breaking it is the outriggers have been too long, but it is possible that the outriggers should be regarded as disposables to some extent. If you discover a modified outrigger that doesn�t break you have to consider where the stresses went. Into the main spar perhaps?
On all 4�s/ J�rgen
Posted by Bob Grimstead on Thursday, September 10, 2009 @ 10:13 AM:
Hi Guys,
Further to Jorgen's original 'Outrageous Outriggers', I have more to add.
As I turned on to the runway at Rygge for my first display there, my right leg broke. I expected it to be the leg, but no, it was the fitting, snapped off within a welded plate, inside the wing.


I inspected it at the beginning of the season, but that crack was hidden.


Fortunately, a nice guy was able to weld it for me, but now I know there are at least three designs of fitting.
I have taken photos, and will try to post them in the next few days.
Then maybe we can settle on what's the best design, and get a few made.
Yours, Bob
Posted by Jorgen on Thursday, September 10, 2009 @ 05:29 PM:
Hi Bob,
sorry I haven�t posted, but I had exactly the same thing happen to me with an identical fracture this summer. I had 4 new fittings made, so I have some spare ones. The guy who made them has a sophisticated lathe, but I can�t remember what quality of metal he recommended and made them of. We could also discuss how the fitting should be welded to the plate- we don�t want it to be too strong and load the spar too much. Tim "flying kroeger" might be on to something with his two point outrigger with a shock absorber to the rear attach point (modifications- fit4 outriggers-thread)?
I now have a track record of 4 broken outriggers and one broken fitting, anybody beat that? My impression is that the black glass-reinforced rods that RS components sell are good, they are stiff but breaks clean away when they should break. And I still think Carthago should be burned- oh sorry, wrong speach- outriggers should be short- 45-46 cm for the RF 4.
May the 4s be with you/ J�rgen
[Edit by Jorgen on Thursday, September 10, 2009 @ 05:53 PM]
Posted by Collin on Friday, September 11, 2009 @ 12:37 PM:
Hello,
This is a bracket I plan on using on my RF4 when I recover the wing. I think it is the later version done by the factory and the later RF5s.
http://www.cfiamerica.com/images/82s_out_riggers.jpg
http://www.cfiamerica.com/images/4-42-50%20Outrigger%20Component%20Details-1280.JPG
http://www.cfiamerica.com/images/4-42-10%20Outrigger%20Nylon%20Leg%20and%20Wheel-1280.JPG
Posted by SteveBeaver on Friday, September 11, 2009 @ 01:28 PM:
I fabricated a set of outriggers exactly per Collin's picture above about a year ago. I have been very pleased with them. When I got my RF4, it had some shock absorbers, springs and brackets on it that were not pretty. The new ones are much better.
I bought the components from McMaster-Carr in the USA (www.mcmaster.com):
4 Ft. 8538K23 Nylon 6/6 Rod 1" Diameter
1 Pack 94912A330 18-8 SS Socket Head Cap Screw W/Lock Washer 10-32 Thread, 1/2" Length
1 Pack 92395A515 Brass Press-fit Insert Without Flange, 10-32 Internal Thread, 3/8" Length
You can see my old outriggers here: http://www.cfiamerica.com/images/RF4D_N7724_Steve_Beaver-2-1280.JPG
Posted by Bob Grimstead on Thursday, September 17, 2009 @ 10:46 AM:
Hi Folks,
Here are three photos of the two types of outrigger fittings that came with Matthew's RF4.
The type like Steve's and RF 5s is what I have on my blue one, while my red one (see photos above) has something similar to the other type.


As far as I can see, you have to strip off not only the fabric, but some of the ply D leading-edge to fit the more modern socket and its back-plate, although they are clearly superior to the older type, modified from the original two-wire legs.
I reckon these fittings need to be as strong as possible, with thicker plates and probably made of aircraft-quality 4130 steel.
I don't think there is any fear of damaging the spar, because you have a built-in weak link in the nylon leg. I reckon that will always bend or snap before the spar is damaged via the upper fitting.
I think I need to get two more wing fittings made up according to Mike Wollard's drawings, unles you are prepared to sell your spare pair Jorgen?
Yours, Bob